My older son has been gluten free for almost 3 years now and anyone gluten free or living with one can tell you that there are some really great products out there now! Pasta, cake mixes, cookies, crackers, pretzels and cereal are all things that we buy and are pleased with in the gluten free department. But, pizza had remained something to be desired either in taste, texture or both. Before I started eating gluten free myself (most of the time...) I had certain crust criteria I was fond of. Crispness, chewiness, thin but not too thin. When I tried gluten free pizza for the first time I was disappointed. I knew it wasn't going to be the same but I was not impressed. I have tried many restaurants crusts, store bought dough and recipes for homemade but still I was in search for one just right, one good enough to make pizza not seem like a facsimile of a sham. A few months ago I tried a recipe (this recipe) and it was good! Texture was decent, it didn't flop around when I picked up a slice or try to break my teeth when I bit into it. Flavor was mild and was a good background for the toppings. But, I am a tinkerer of a cook and also fearless to improvise when I am short an ingredient. Magically a few nights ago I discovered the best crust yet. Are you ready for this? It was crisp, chewy, thin but not too thin. It held shape from plate to mouth in hand, didn't hopelessly stick to the pan. It's still not regular pizza, but it is good. Here's how you can have good pizza too:
Flour blend:
1 cup sweet white rice flour (yes, it really does matter if it's the sweet)
1/3 cup sorghum flour
2/3 cup brown rice flour
1 cup potato starch
1/2 teaspoon xanthan gum
1 teaspoon sea salt
1/2 teaspoon baking powder
1 Tablespoon instant yeast
2 Tablespoons honey
2 Tablespoons olive oil
1 1/4 cups warm water (110-115 degrees)
Preheat oven to 400 degrees. Place all dry ingredients in stand mixer bowl and blend together. Dissolve honey in warm water and add oil. On low speed add wet to dry then mix on medium speed for 1 minute. It should come together in a ball and not be too sticky. Oil 2 large pizza pans well and your hands. Divide dough evenly and press into about a 12 inch circle with a slightly raised edge (this step takes time, press from the center out and keep it very even until about 1/4 inch thick). Pre-bake for about 10 minutes. Top as desired and bake another 10-15 minutes ( go for longer cause I like that crisp crust!) Let cool for about a minute and then remove from pan on to a board to cut. It may stick just a little to the pan but nothing a good spatula and a little loosening won't fix.
Now, the flavor is something I am still working on because it still tastes gluten free. Next time I plan to replace the water with warmed beer and add some fresh finely grated Parmesan. If it is a success I will add in the variation. Now go try this pizza!
Showing posts with label Recipes. Show all posts
Showing posts with label Recipes. Show all posts
Friday, November 7, 2014
Monday, August 26, 2013
Canning in Really Tiny Batches

This is the first year I have ever grown banana peppers. A few years ago I discovered the tangy deliciousness that is pickled banana pepper rings and I wanted to make these stupidly simple things at home. This year I decided to end my fear of pepper growing failure and try bananarama, cayenne, Chinese Giant and jalapenos. They are easier than I thought! Everything is very fruitful even if it did take longer than I though for them to bloom and fruit. But, it's been an odd growing season here in Maine. Yeah, lets say it's the weather *winky wink*.
So, anywho! There were two big banana peppers just hanging screaming "pick me!" from under those glossy dark leaves. I hesitated thinking that only two would barely fill a 1/4 pint jar. But, if I waited to long for a couple more to mature I would be out of luck on the first two. Well, what is wrong with making one small jar? Nothing! So I plucked them off and decided to pickle this afternoon.
I had bookmarked this recipe a few weeks ago. Knowing that I will be making more soon, I made a half batch of brine and the extra will stay in the fridge for the future. The only modification I did make to the recipe is instead of boiling the brine with garlic I put a small clove of garlic in the bottom of the jar with the peppers along with a pinch of red pepper flakes for heat. Banana peppers are not spicy, FYI.
Here are my personal steps:
1. Wash and slice your peppers (2, 50, it don't mattah). And, peel a small garlic clove.

2. Heat jar(s), lid(s) and ring(s) in your canning pot. Mine is a medium pot with a steamer in it for this project, heating my huge canner up seemed superfluous.

3. When your brine and jar(s) are hot, proceed to put the garlic and about 1/8 teaspoon of red pepper flakes in the bottom of the jar(s). Then tightly pack in the peppers.


4. Pour in brine with 1/4 inch head room.

5. Wipe rim and lid it up.

6. Gently put in your water bath canner of choice and process for ten (10) minutes.


7. When your beeper goes off, retrieve your screaming hot jars carefully and place on a folded towel to cool. You have just made your own banana rings. You should feel amazing.
Remember that extra brine? Pour it in a spare jar and let it cool (for goodness sake don't stick it boiling hot in your fridge). Lid that up too and store in the fridge forever. Or, until you need it. Whichever comes first.

So what have we learned today? Was it that there is no such thing as too small a canning batch? Was it that I am a crap photographer? Nope, it was that I am completely contradicting because I used the word 'mattah' and then followed it with 'superfluous'. It's hard keeping up the image that I am all Maine-ah all the time. Secretly, I have a bitchn' IQ. Surprise!
Til next time people.
Tuesday, January 15, 2013
Breakfast Burritos

We had these on day 11 of the Pantry Challenge. They were awesome. Here is how I made them!
I had 9 eggs, onion, mini peppers, 9 strips of bacon, about 1/2 a cup of black beans and wheat and white tortillas. I sauteed the veggies then scrambled in the eggs while the bacon cooked on a rack in the oven.


I chopped up 5 strips of the bacon (saved the other 4 for pizza) and added that to the eggs as well as a last minute addition of some chives. Then I warmed the tortillas so they would roll better, lay one out with a slice of american cheese in the center. I measured 1/3 cup of the egg mix and plopped it in the middle.

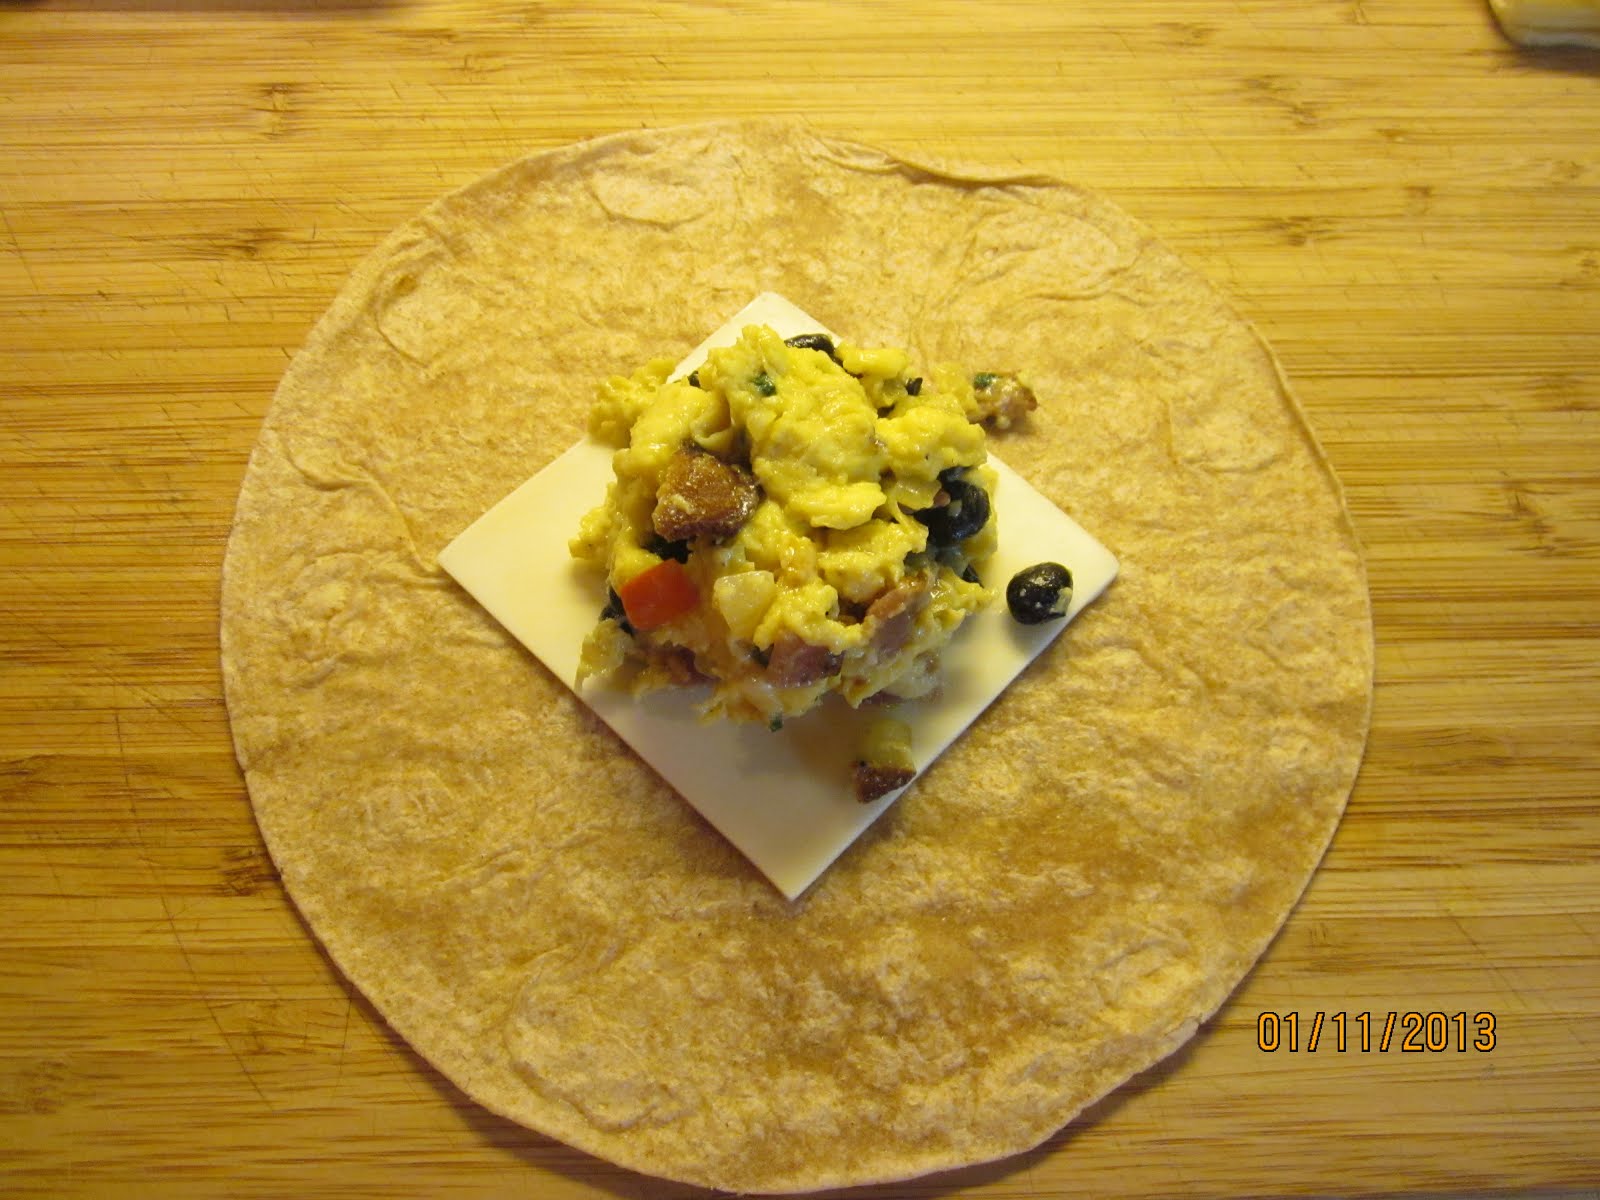
Roll it up and put on a pan. When you have them all done, I got 8, put them in a 350 degree oven for about 10-15 minutes to melt the cheese and get the tortillas slightly crisp. Then eat them. Just not all of them. It will be hard to resist, they are that good. So easy and could be really cheap if you use it as an opportunity to clean out your fridge like I did.
Wednesday, January 2, 2013
Pantry Challenge: Day 2

Puzzle Boy went back to school today so our morning was the typical drive into the city to his school. He eats GF cereal on the way in, he's not a morning eater really. After I dropped him off, Mini Me and I hopped over to Whole Foods (my favorite store) to grab some gallons of organic milk and a few other missing items from the menu. I still need to go again for some basic things I have run out of (kosher salt anyone?). Here is what I bought today:

2 gallons of lowfat organic milk- $11.98
1/2 gallon of orange juice- $3.19
2 Odwalla smoothies (2/$5.00)- $5.00 + $.10 bottle deposit
1 cabbage (@ $1.29/lb)- $3.13
1 large bunch of celery- $2.49
1 package whole wheat burger buns (8)- $3.29
Total: $29.18
I drank one of the smoothies for breakfast and the other one will be tomorrows breakfast. I am not a morning person, ok? And I have given up coffee, my favorite thing. After tomorrow I will be making my own smoothies, today I fell victim to a sale and a twist top.
For lunch I had a sandwich with leftover ham and PB had GF pretzels with a clementine and cheese stick. Mini had a baby yogurt. The kids lunch items are staples in this house, I will be restocking by week 2 or 3.
For dinner it's lentil and ham bone soup. We had a ham bone in the freezer from my grandmother's Christmas party that needed to evacuate. I immediately thought of pea soup, a family fav, but alas I was out of dry split peas! I thought, out I will just grab some at the store tomorrow! Then my mom said, "No!" so I said "Lentils!". Let the innovation begin!

Lentil and Ham Bone Soup
1 meaty ham bone
1 lb green lentils
2 medium carrots, peeled and chopped
1 small heart or 2 lg ribs of celery, chopped
1 medium onion, chopped small
2 bay leaves
1/2 teaspoon dry thyme leaves
1/8-1/4 teaspoon red pepper flake
salt to taste
6-8 cups of water (to cover by 1 inch)
Dump it all in your crock pot on low for about 6-8 hours until the lentils thicken the soup. Remove the bone and meat, chop up the meat and add it back. Remove the bay leaves, they might hurt your throat. Or leave them in, I hear it's good luck to the one who gets one in their bowl! Just don't eat them, I beg you.


Along with the soup I will be making bacon cornbread! YUM.
Let me know if you are participating and tell me how you are doing! Leave a message, I love messages!
Sunday, July 8, 2012
Homemade "Nutella" Chocolate Hazelnut Spread

I am a cheap person. No really! I hate spending money, I hate it as an object even more because I am always in need of it. We have a budget for food that we cannot afford to go over but as always I find myself a few days short and out of money but I needed something yummy to put on s'mores tonight for a church ladies campfire. I immediately thought of Nutella! But no money... wait a second... I have some hazelnuts! So desprate and frugal me I grabbed those nuts out of the cupboard and threw them in the mini food processor. I ground them smooth, added my homemade chocolate syrup and a heavy splash of rice milk and a tiny splash of vanilla and blended with a spatula. It was spot on and it only had 4 ingredients. Cheap and easy.
Recipe:
1/2 cup roasted, cooled hazelnuts
1-2 tablespoons chocolate syrup
1 tablespoon milk (any kind)
1/2 teaspoon vanilla
Grind hazelnuts until very smooth like butta. Spoon into a bowl and add rmaining ingredients, stir or whisk until well combined and smooth. Store in an air tight container in the fridge.
*Note: It may have a bit of a grainy texture and that's cool, makes it easy to see it's homemade! Be proud of your thriftyness and get used to it!
Thursday, May 24, 2012
Gluten Free Pumpkin Muffins

My son is gluten and dairy free. This has been a learning curve for me as I have been making a lot of his treats I took for granted. We started this diet the end of March and went cold turkey. The changes and improvements in his behavior and speech have been profound and I am so glad we did it. Today he ate his last GF muffin and it was time to restock the freezer. I skimmed through his cookbook, The Kid-Friendly ADHD & Autism Cook Book, and from what we had in the pantry I chose Pumpkin Bread. I made 12 muffins and 3 mini loaves so we should be set for a month or more. If you are gluten free this is a must try because it is so good!
3 1/2 cups GF flour blend (I use Bob's Red Mill)
1/2 teaspoon xanthan gum
3 cups sugar
2 teaspoons cinnamon
2 teaspoons nutmeg
2 teaspoons baking soda
1 cup canola or vegetable oil
2/3 cup water
1 can (15 oz) pumpkin puree
2 eggs
Preheat oven to 350 degrees. Combine all dry ingredients in a large mixing bowl. In a separate bowl combine the remaining ingredients and mix well. Add wet to the dry and mix very well. Add chocolate chips if desired (I didn't this time).
Divide batter among three 8X4 bread pans or two 12 cup muffin tins that have been sprayed well with cooking spray. Bake loaves for 45-50 minutes until they test clean, muffins for 40 min until they test clean. Cool completely before cutting serving.
Enjoy!
Subscribe to:
Posts (Atom)